Multi-lights
*Time Check
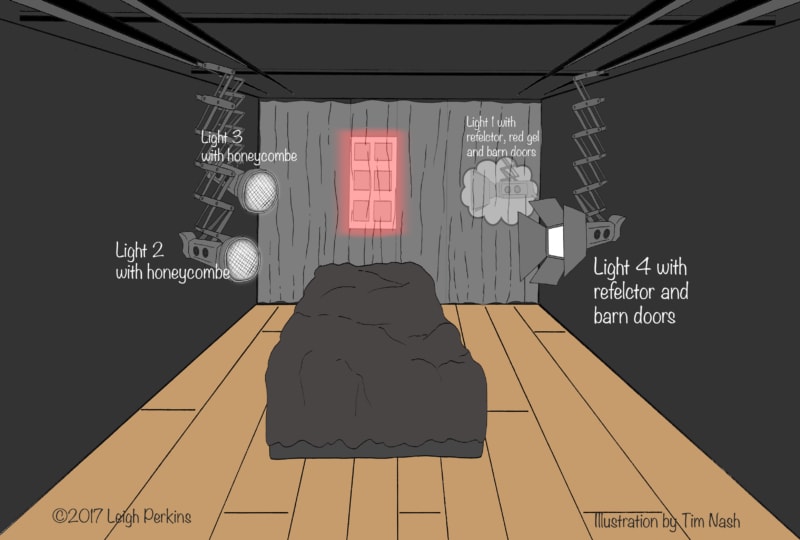
12 o’clock is the centre of the red widow behind the model and as always the model is at the centre of the clock.
Employing four lights in one studio set may seem like overkill to some, but I love the subtleties that this over-complication can bring to an image. This series of images demonstrates both the need and the benefits of utilising multiple-light setups to create highlights and shadows aplenty.
OK, when I said four lights I was cheating slightly. One of the lights is not actually being used to illuminate our model, but instead it provides an interesting window-effect. Virtually none of this “window light” falls onto our model, Lucy – it’s just used to create the window illusion and add a sense of depth to the shots. Adding the red gel to this light also serves to create some ambience and narrative to the scene (which you can see in Image 2).
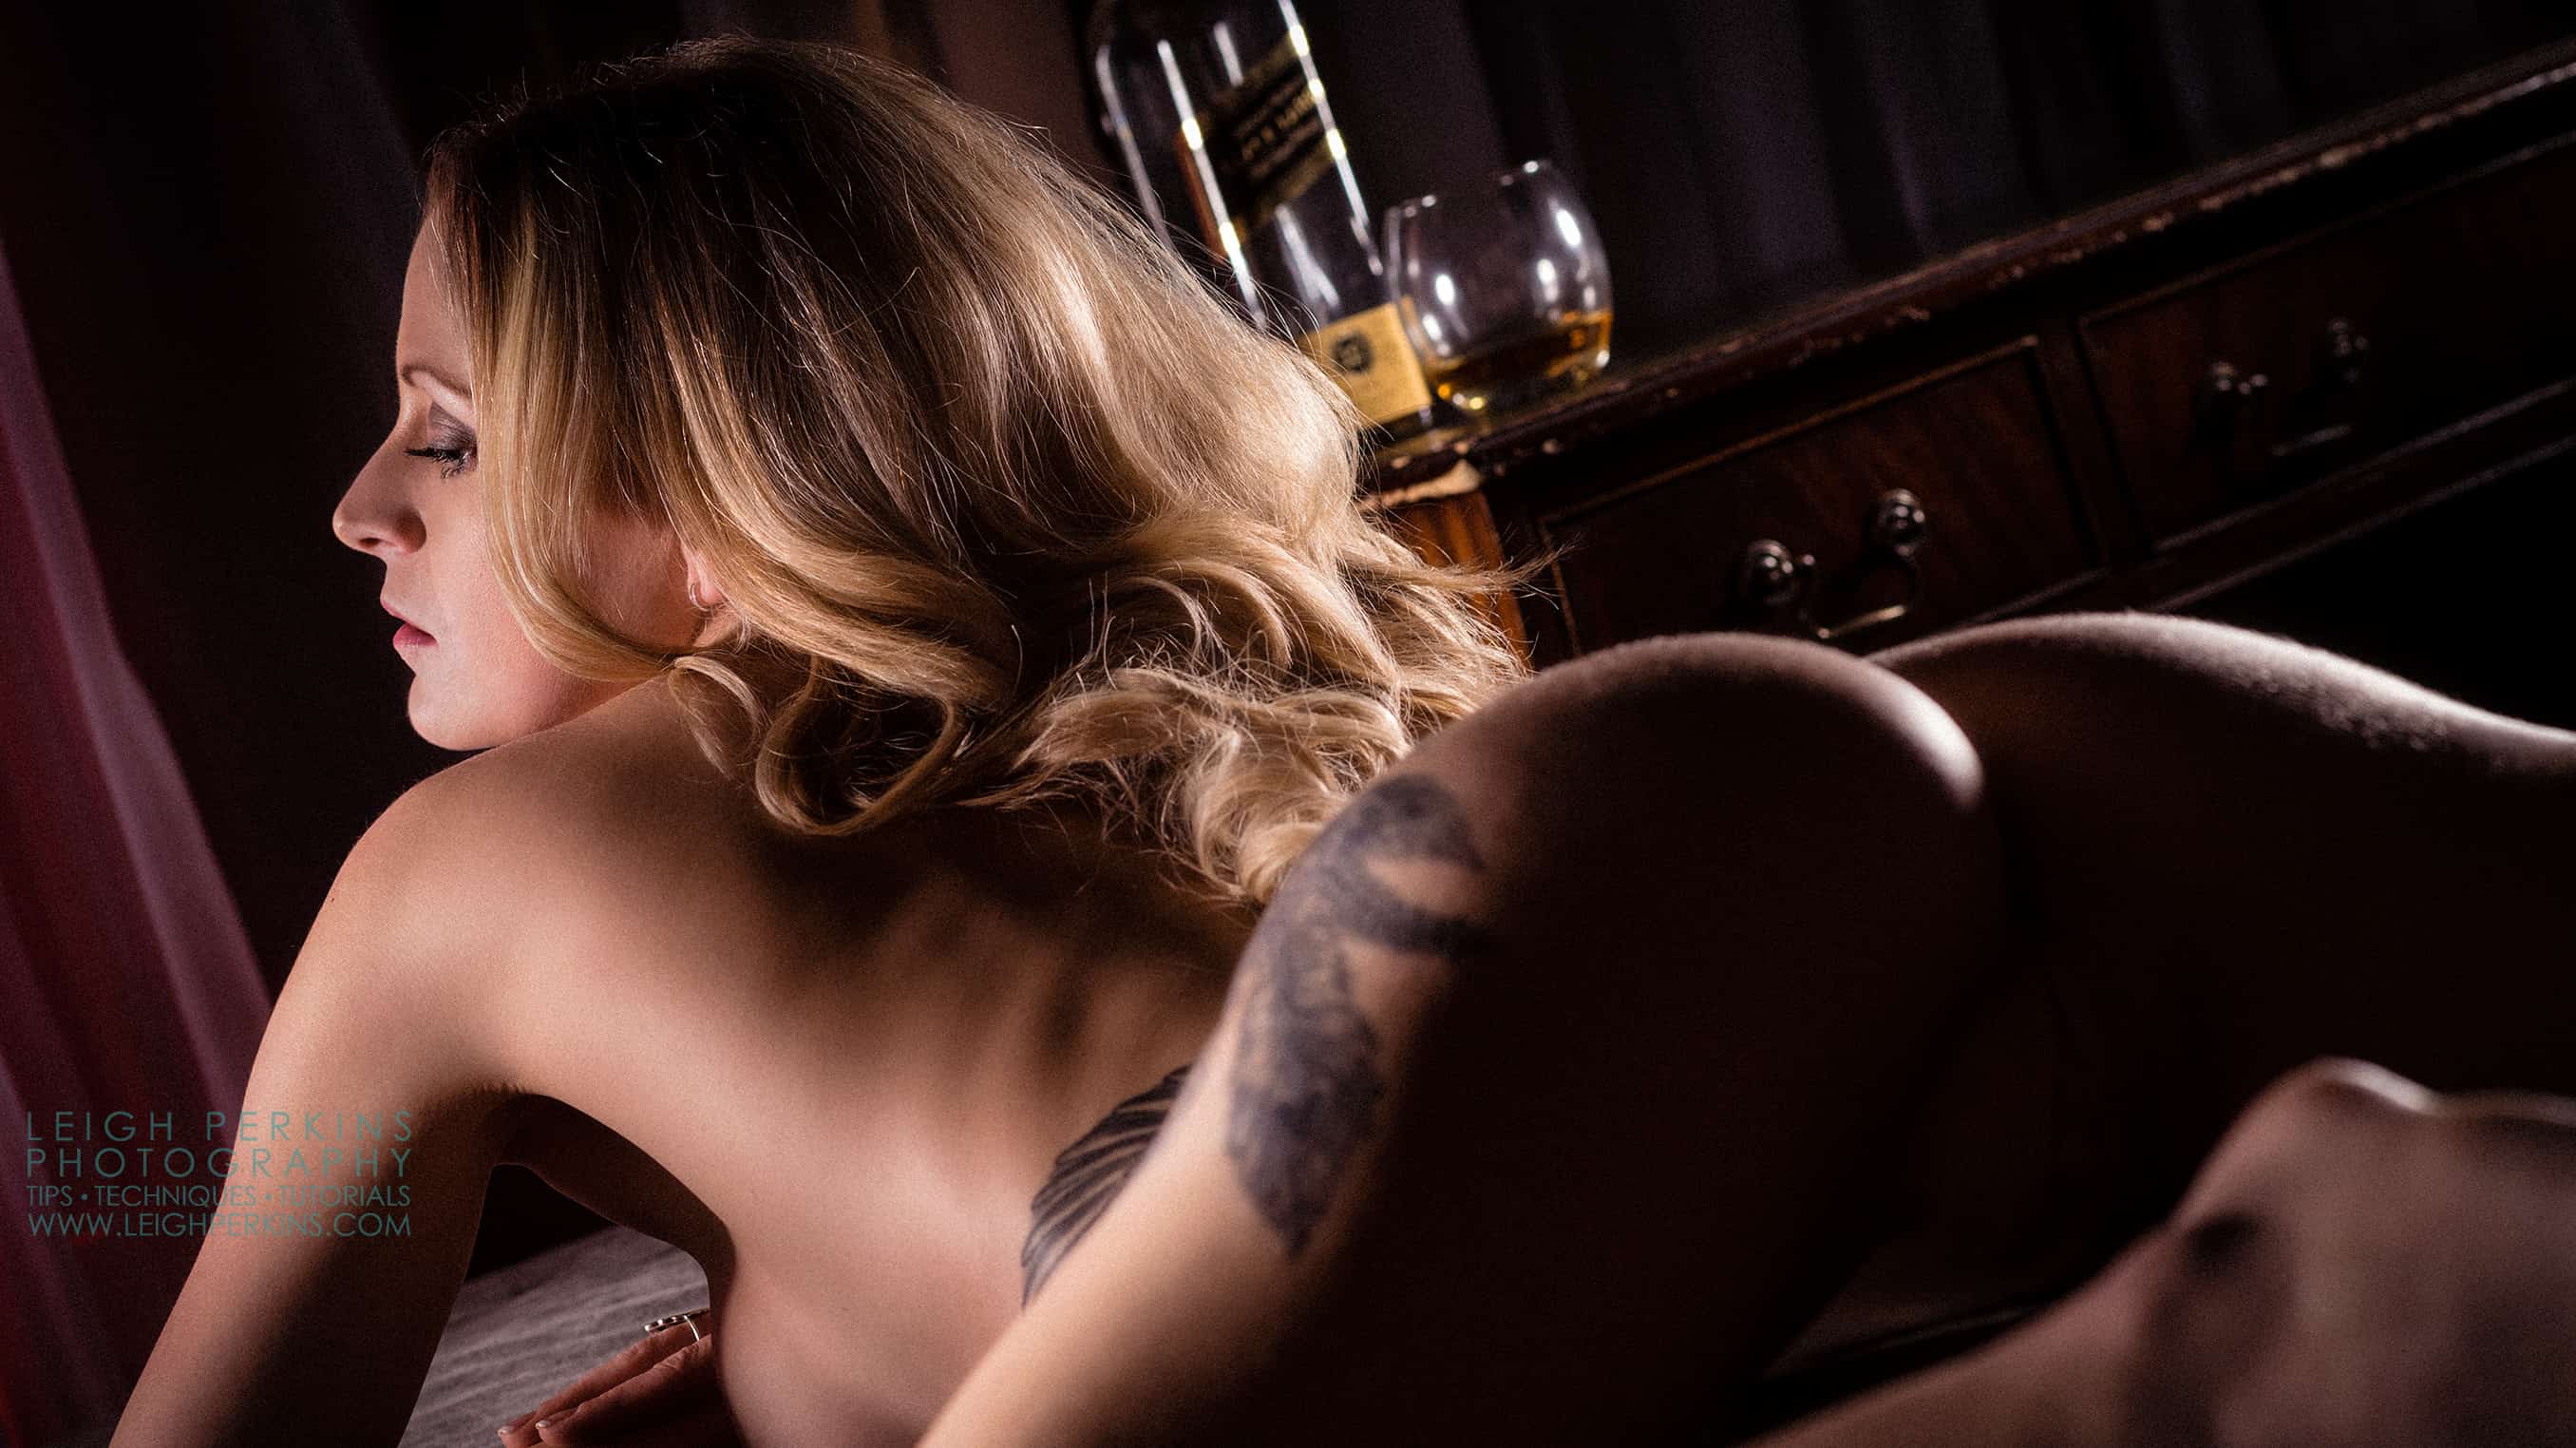
Image One:
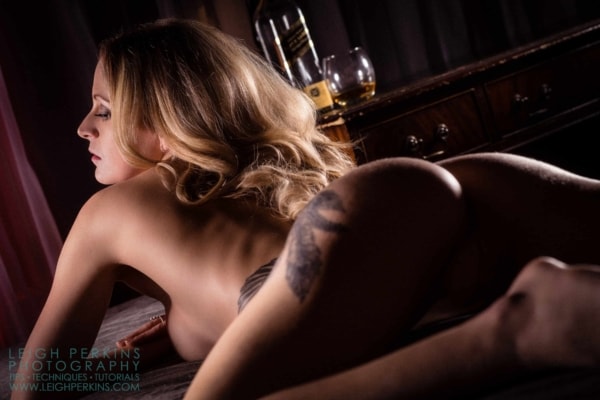
Our main light is in fact two lights. One at the eleven o’clock position and one at nine o’clock*. Both are positioned low down in line with the model to keep her back partly in shadow. Both are equipped with standard reflectors and honeycombs to create pools of light where needed, in this case this is the face and shoulders for one light and the side of the body and thigh for the second light. To all intents and purposes, the two are being used as one light but split to direct the light source into two very slightly different directions.
Bum Light
The fourth and final light is being used in the two o’clock position. Again a standard reflector is used but this time with some barn doors and diffusion paper on the front to direct and shape the light. This illuminates Lucy’s hair and gives us a splendidly pleasing highlight on the bum cheeks. It’s the highlights from this light that give shape and form to the bum and ultimately the sexiness to the shot. Without this light Lucy’s posterior would simply be resigned to the shadows with nothing to separate it from the background – wouldn’t that be a crying shame. Once again the light is positioned quite low so as not to overly light her back and keep strong shadows between her thighs. With the lights set for this first pose I’ve adopted a camera position of low down at about seven o’clock enabling me to capture the bright highlights on the bottom and the flatter lighting along the side of body.
Of course you can fake it…
Shot on an 85mm lens at an aperture of f7.1 from quite close, this gives a fairly sharp drop off of focus between face and bottom and face and background. On my workshops I often hear people suggest that “we can fake the depth of field in Photoshop post processing yeah?” Well yes indeed you can my friends but why would you when you can do the real thing in camera which looks far more realistic because errr…it’s real. And you save yourself a bucket load of time post-shoot in which to drink beer and plan your next shoot! Of course the caveat to that is if you’re shooting on anything other than a camera with a full frame sensor or larger you may want to fake it because you simply can’t get the shallowness of focus in camera. Less beer and planning time for you crop-sensor guys. One more excuse to justify treating yourself to that full frame sensor camera ? But I digress. The low camera angle helps to maximise this focus drift as well as emphasise the strong highlights on the model’s bottom. Bad for my knees but great for the resulting image.
Image Two:
It’s All Relative
Not too much changes with the lighting for this image. It’s just a question of matching the lights to the new pose.
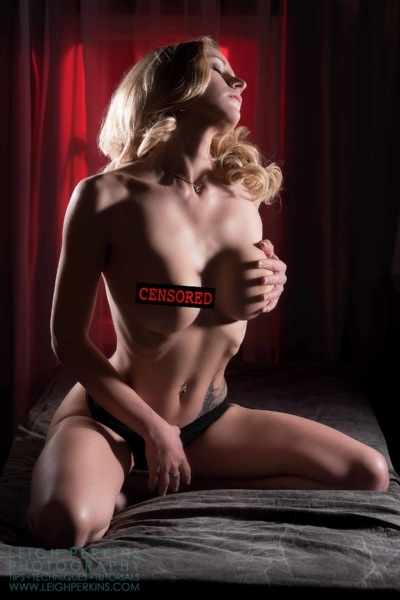
It goes without saying that the window light hasn’t changed at all (even though I just said it). Lights two and three again stay to the rear of the model, around eleven o’clock but rather than them being side by side to illuminate along Lucy’s body they are now one above the other because she is sitting up. Relative to Lucy they are in the same place as before, one lighting her hair and upper arm and the other lighting her back with a hint of spill on the leg. But now because of the change in camera position these lights are providing highlights and ‘rim” lighting rather than being the main source.
The fourth light is closer to two o’clock but now the barn doors have been arranged to shape the light into the vertical rather than horizontal as in the previous image. Check out the shadows between the breasts and the center line of the tummy. That’s the tell-tale sign of where the light source is coming from.
Once again because of the change in camera position, we are now seeing more of this light falling onto Lucy’s body and therefore this has become the main light source. In effect the main light and the key light have switched roles from the previous image purely because of the change in camera position.
Shooting from the central six o’clock position enables me to frame the model within the confines of the window in the background helping to add depth to the image.
Once again the 85m lens set at f7.1 is enough to drift the background out of focus. The key light to the left of the model separates her nicely from the background and helps emphasise the curve on her back. The shadows created by the side lighting from both sides help emphasise her tone and shape.
Breaking The Rules
The rule of thumb tells us that the more lights we use in an image the less contrast we will have. This is because, generally speaking more lights means less shadows hence less contrast. However, by using modifiers that control and restrict the fall of light we can create specific areas of shadow and highlight which retain the overall contrast and create a more dramatic atmospheric result as seen here and in the galleries below. JOIN NOW to see the galleries and the rest of this post.
The second part of this post contains additional lighting, shooting and posing tips and images including some NSFW artistic nudity. It is available to members only – not a member? Join here.

