I have what can only be described as a “love/hate” relationship with my archives. My terabytes of back catalogue pictures from model shoots go back to 2004 so there are literally thousands of images for me to love and admire, despair and cringe away from in equal measure. Not deleting images is a conscious decision coupled with a time saving “can’t be arsed” attitude. However, leaving all the images from my past model shoots intact enables me to look back and give myself a good dose of self-critique. It allows me to see how far I’ve developed and how I might still improve my photography. Images that I was proud as punch of a over a decade ago now reveal their flaws while others stand the test of time and are still stand-out favourites.
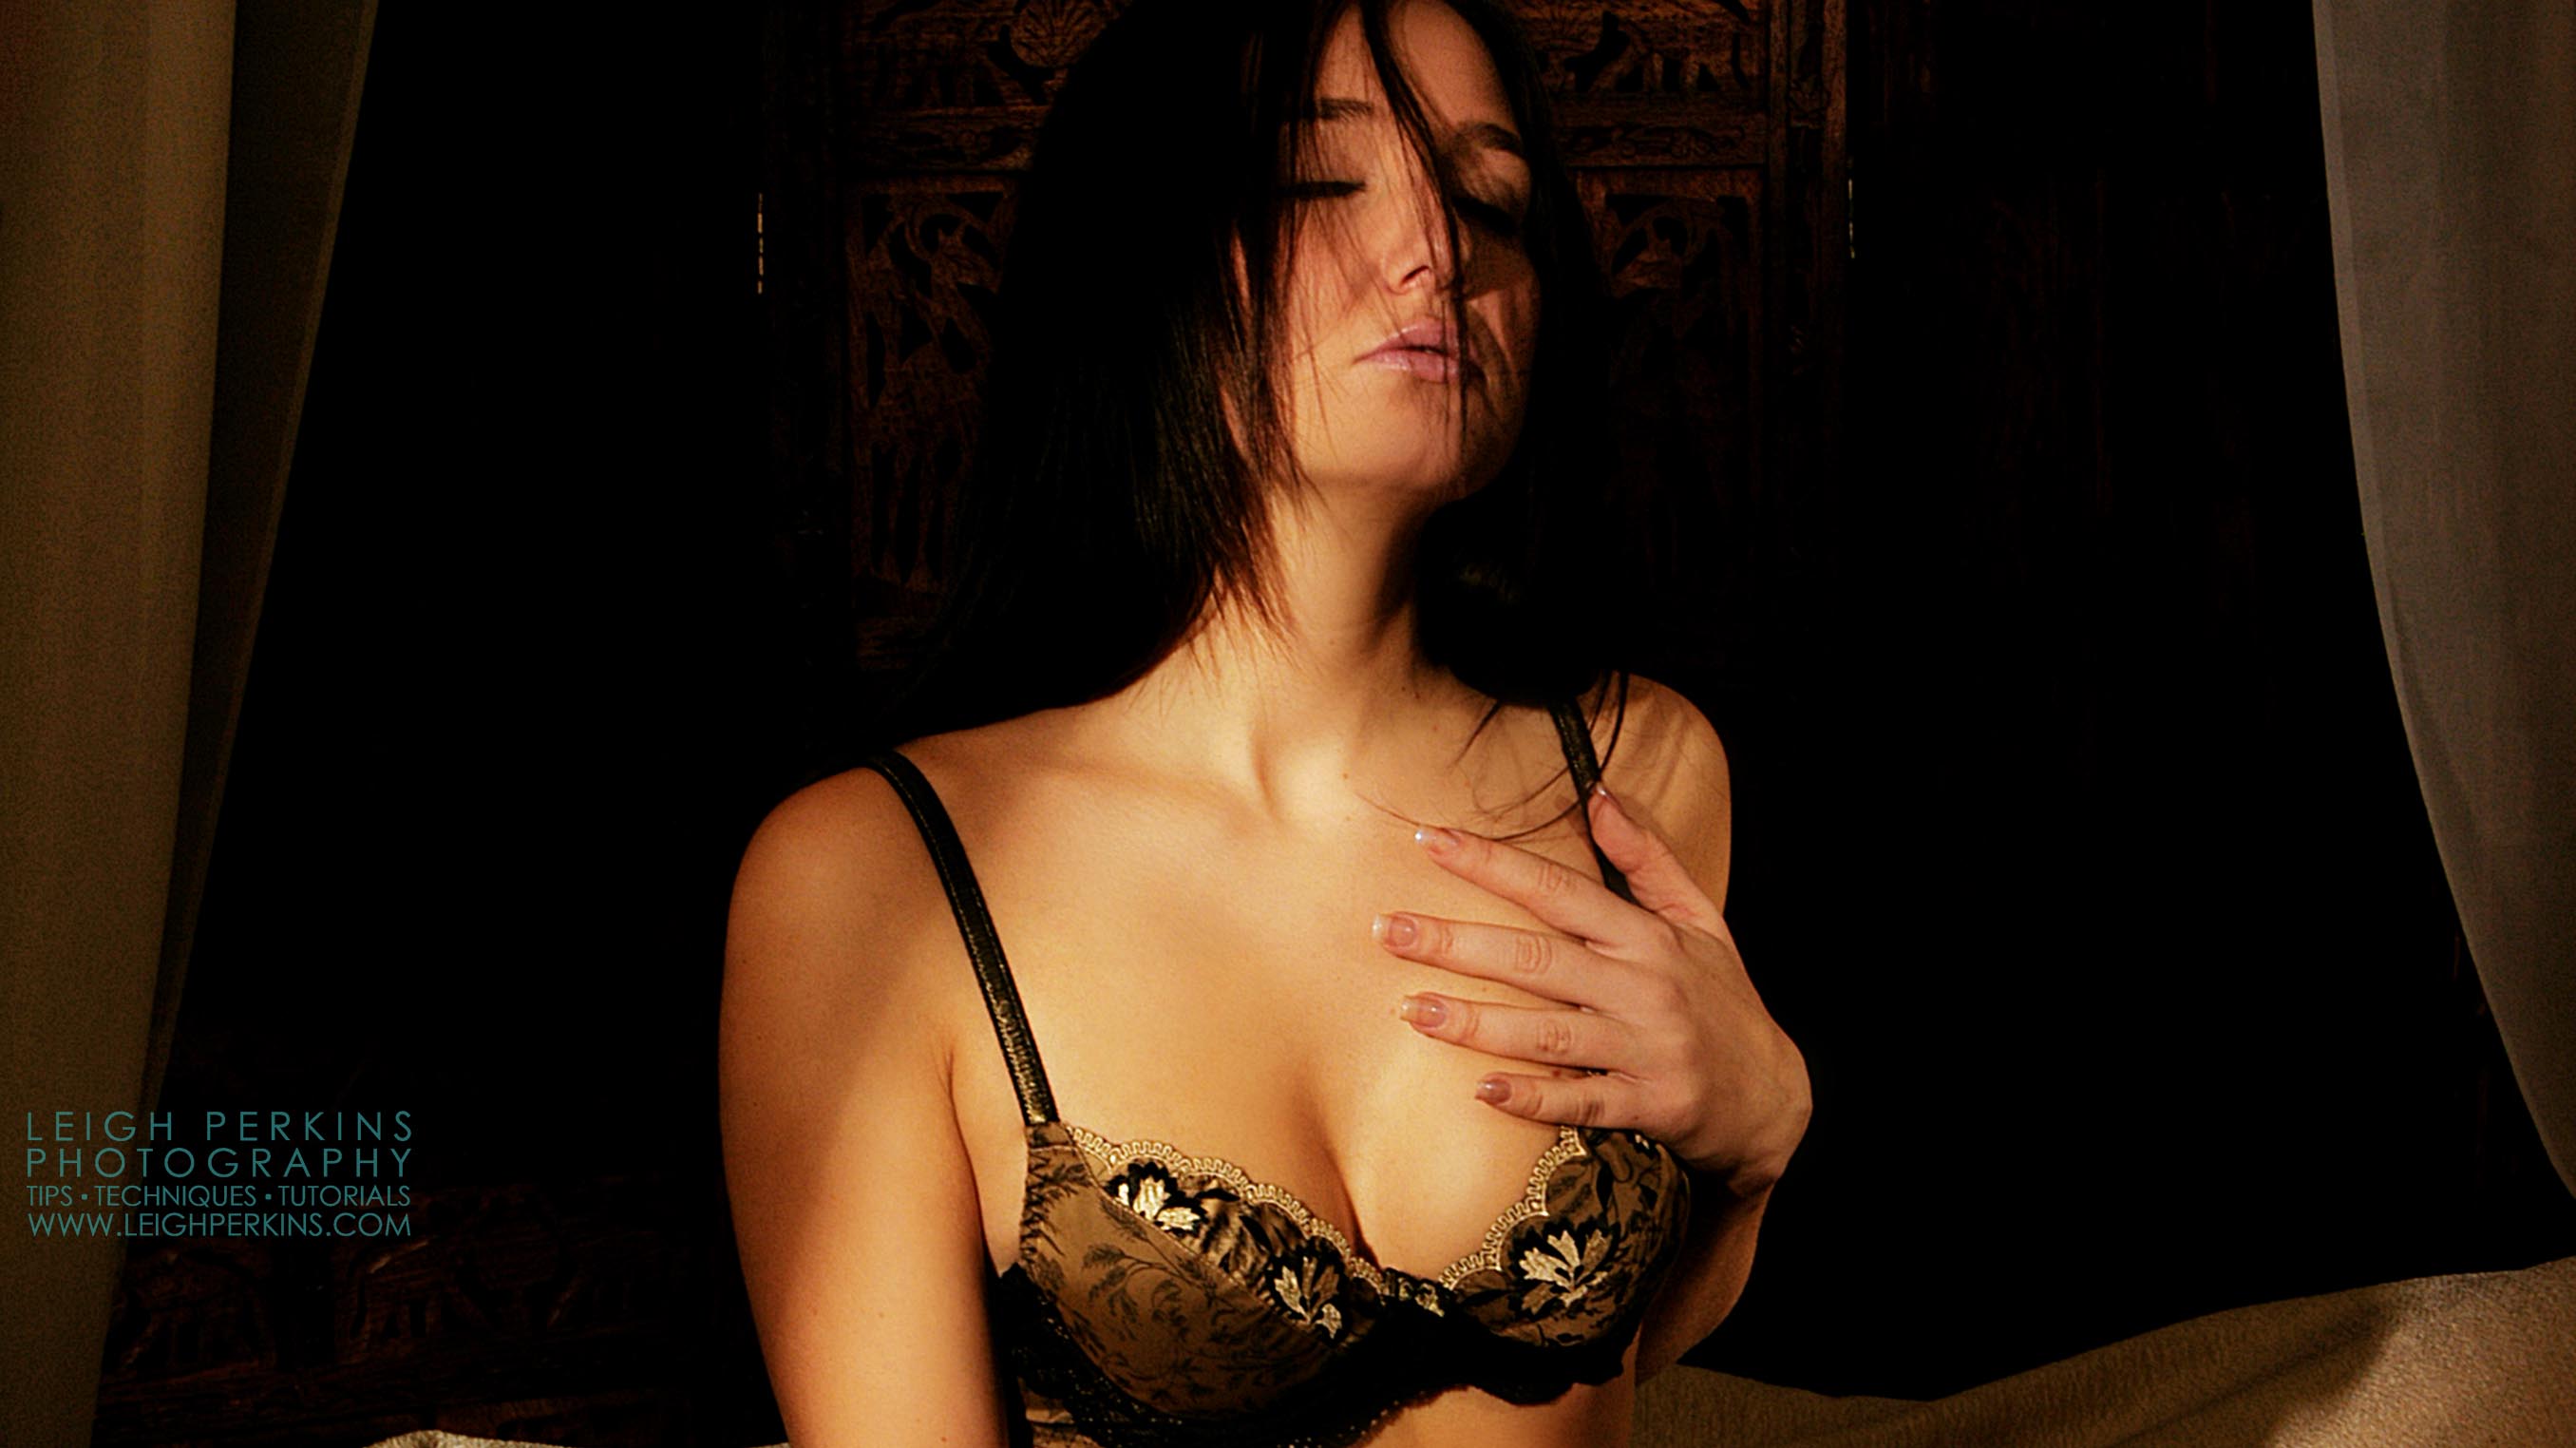
This “In The Spotlight” image definitely falls in the latter category, not least because it was from my first ever shoot with this particular model in 2005. It was a shoot that not only produced some simply awesome images, but it helped forge a friendship that has lasted to the present day. In fact I’ve shot Sammie so many times since that first shoot that my archive is overflowing with her images. When she decided to move on from modelling I trained her in Photoshop editing and she is now employed as my image editor for my Mighty Aphrodite client images.
For the shoot, I had in my mind the idea of creating a sunlit bedroom. But not just replicating any old sunlight, that would be way to simplistic. I wanted to crank it up a notch, cause myself a ton of frustration and create late-evening, summer/autumn sunlight. There’s nothing like thowing in a few curve balls when planning a shoot!
Well the setting was fairly simple – start with a blackout studio, that was easy. I have no windows in my studio and plenty of black walls! So a roll of standard black background paper was the start. In front of this I placed a couple of wooden room dividers. eBay was in it’s heyday back in 2005 and virtually the whole of my studio props were the result of frenzied bidding wars. The dividers were made of quite a dark, warm-coloured wood so would suit the theme of the shoot nicely as long as I didn’t throw too much light at them.
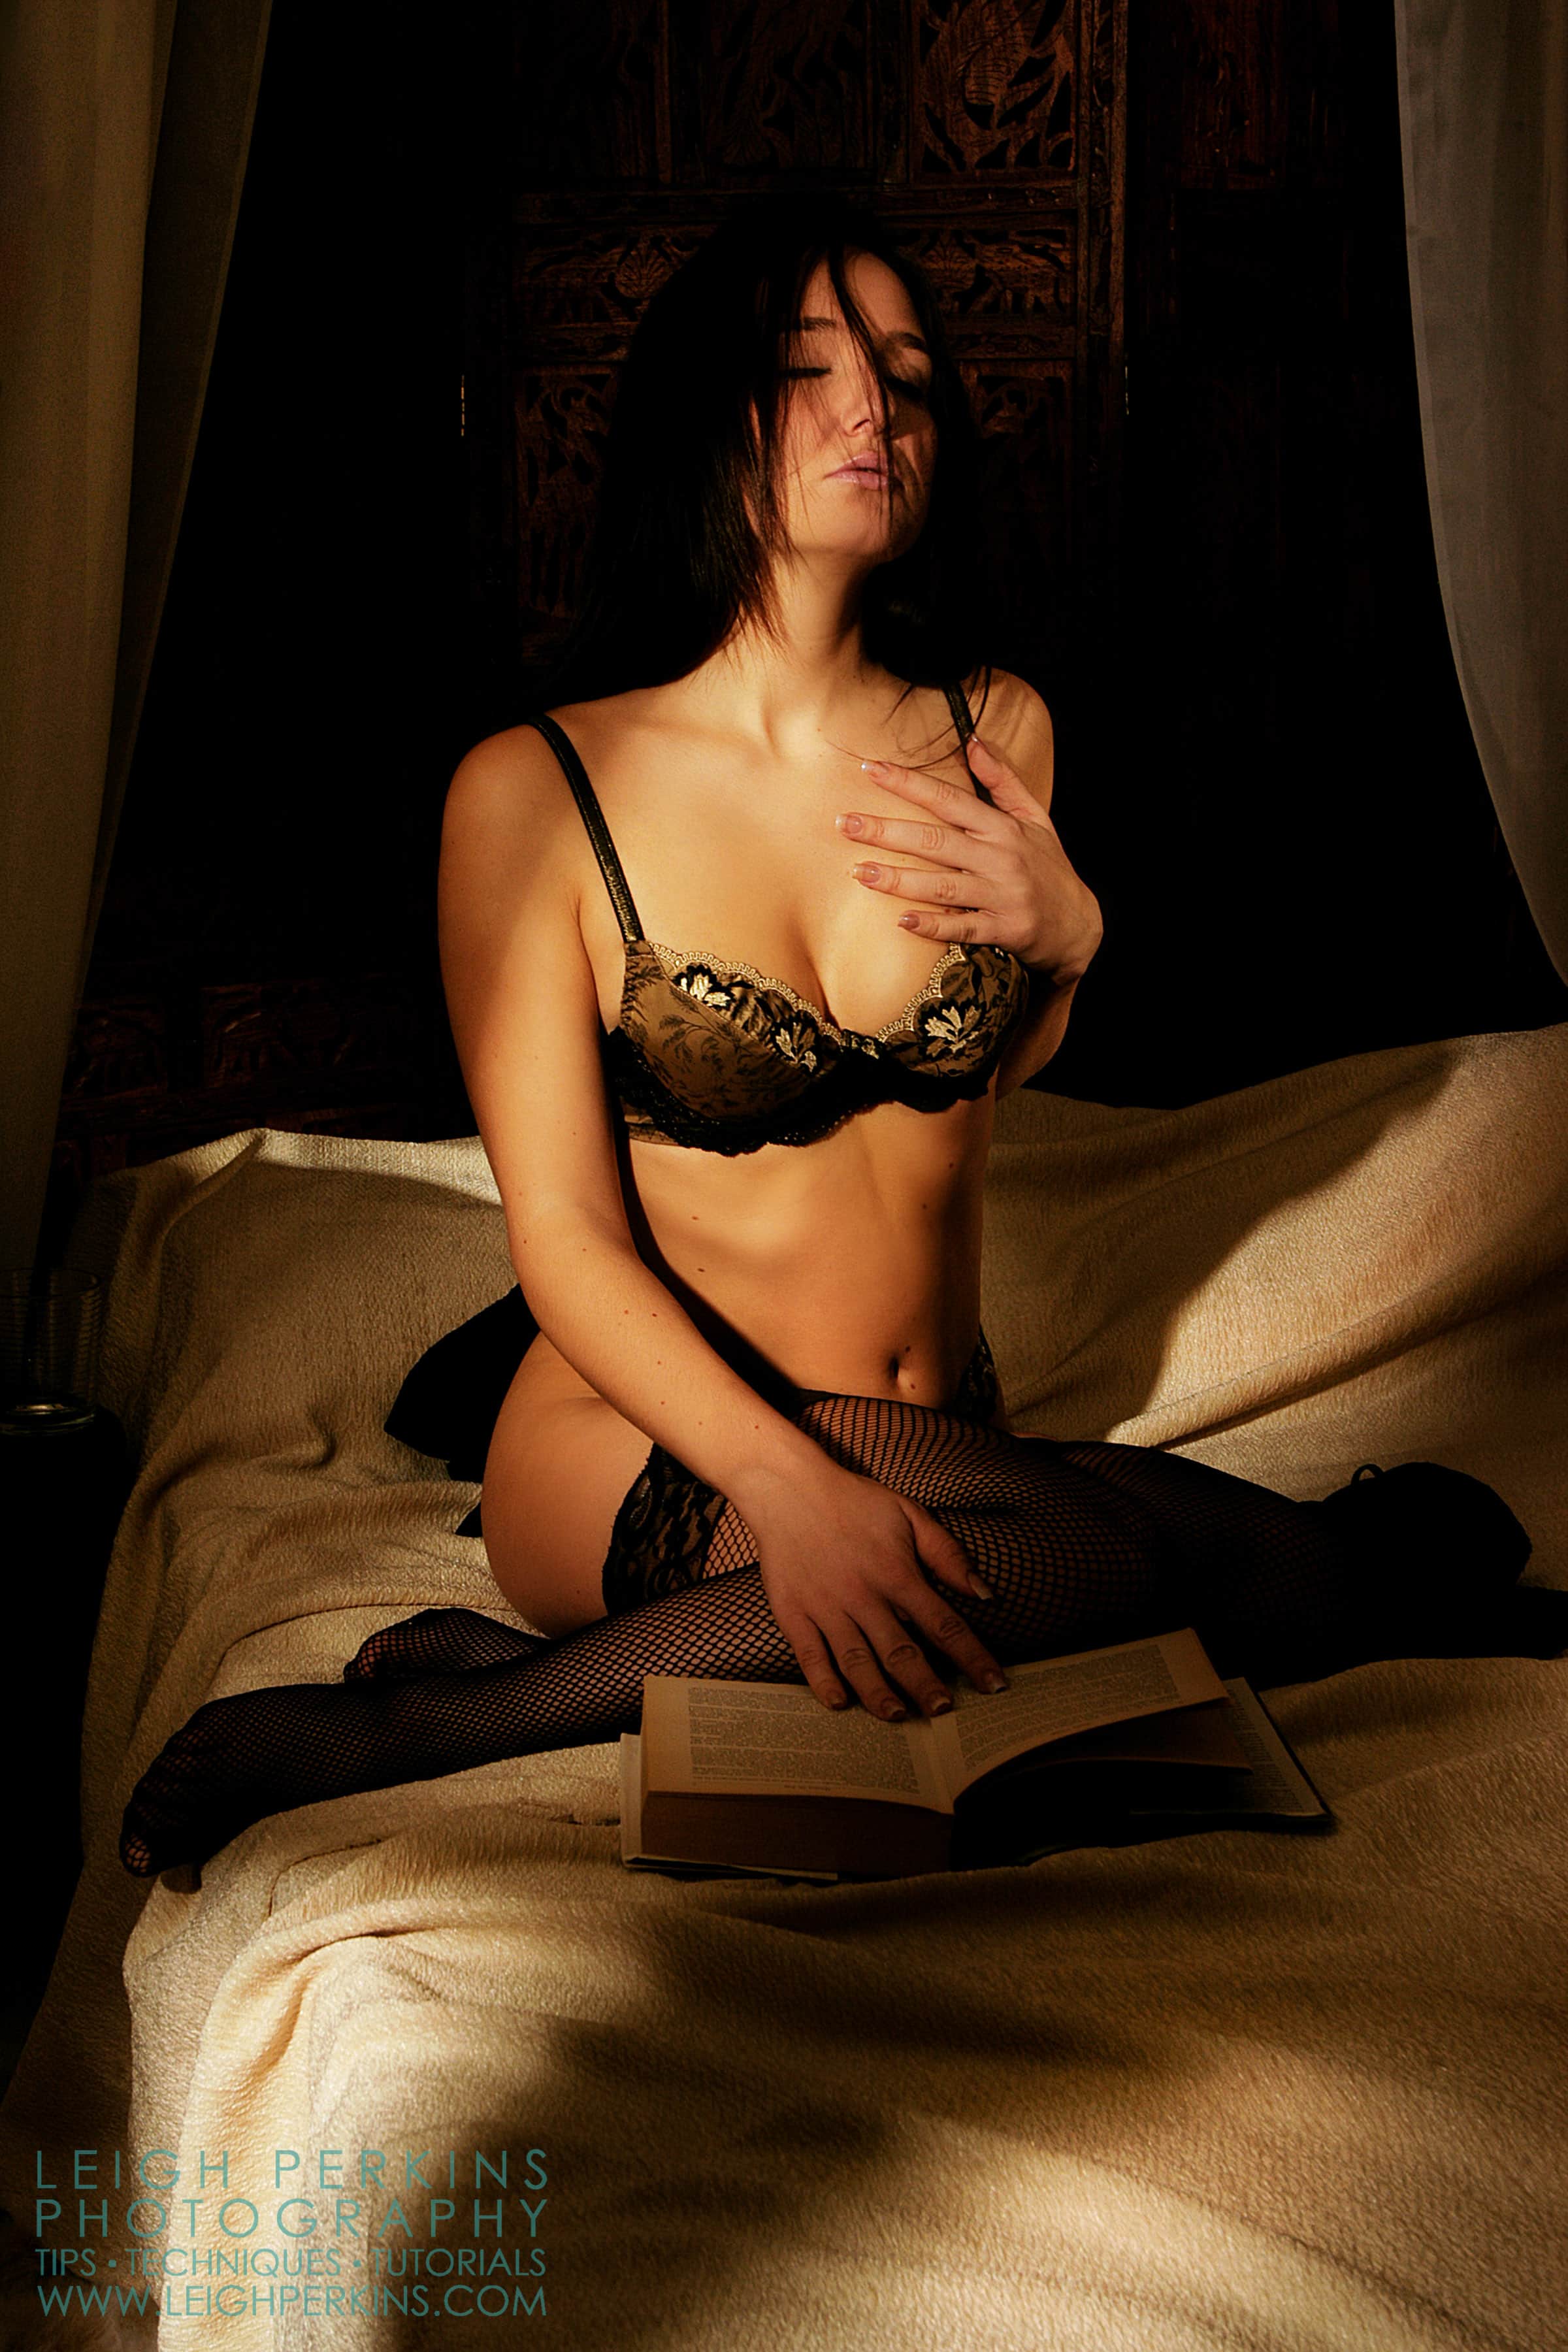
The bed in my studio in those days was an occasional foldout style bed, basic but it did the job. The fabric on the bed needed to be something lighter than the background so as not to disappear and also bounce a little light back into the image. So I used a cream chenille throw.
To help disguise the paper background and help give the impression of a room setting, I hung some light, sheer fabric from a background support pole and draped it across the edges of the dividers, to soften and create the illusion that there is more room beyond the edges of the frame. To add to the bedroom illusion I added a few props in the background – a bedside table, glass and a bottle of JD, (of course other brands are available)! I also gave Sammie a book to help give some narrative to the image and it gave her something to occupy her hands – there are only so many times you can ask a model to pretend to adjust her underwear. ?
So with the room set it was time to move on to the lighting! This was going to be tricky. I knew the look I wanted but in the space I had available, it was a tough ask. I only wanted to use one light and I tried a simple standard reflector dish first and then swiftly enhanced that with the addition of some barn doors.
To create the “window” effect I wanted, I needed to create the shadow of the window on the bed, model or background. A simple rectangle cut out of a piece of A3 card should do the trick. I’d shine the light through the cut-out and and have a rectangle of light on the set with some crisp(ish) edges going off into the shadows. Hmmm, if only it were that easy. Let’s think about this a moment. If you want a sharp(ish) shadow of a window frame akin to a real window in real life where do we need to position our elements i.e light source / cardboard cut-out / subject? Well if we think about the real life scenario, our light source is errr 93 million miles away and our window is just a few feet away from our subject. Of course, we can’t place our light source 93 million miles away – the wireless trigger system simply wouldn’t work at those distances and you’d need a very long power cord. Placing the cardboard cut out of our window directly in front on our flash won’t work either. The light will simply shine straight through the cut out and the projected edges will be too soft to be defined as anything interesting. The answer then, as in the real world, is to move the “window” away from the light source. Not so easy in a studio of my size.
So after a little bit of umming and ahing and a few trial re-positions of all the elements I finally got a scenario that worked. Not, however before re-designing my cardboard window. I realised that this had to be as large as possible to stop too much stray light falling into the set and with a surprising small cut out for the window template. Also, rather than just a basic rectangular cut out, I left a central vertical bar to help create a more convincing effect. The card was now more like A1 in size with about half of it cut out for the window. I supported it on a couple of light stands a few feet away from my model and the light source about eight feet behind it. The further back the light source is away from the cardboard cut out the sharper the shadows become. The shadows of the “window frame” in this shot are not crisp by any means but they’re sharp enough to retain the illusion and the overall effect is, I think, quite pleasing.
So there we have it, with a big sheet of cardboard, plenty of gaffer tape, bulldog clips and a bit of trial and error, I managed to re-create what I had in my minds eye and produce a series of sexy, atmospheric images. And all with a camera boasting a jaw dropping 6.1 million pixels…well, jaw dropping for 2005!